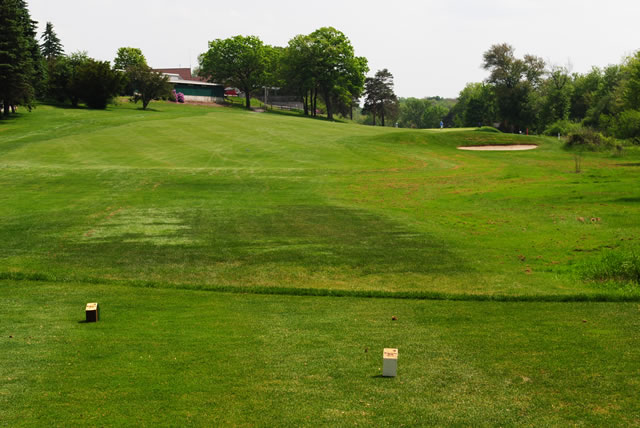
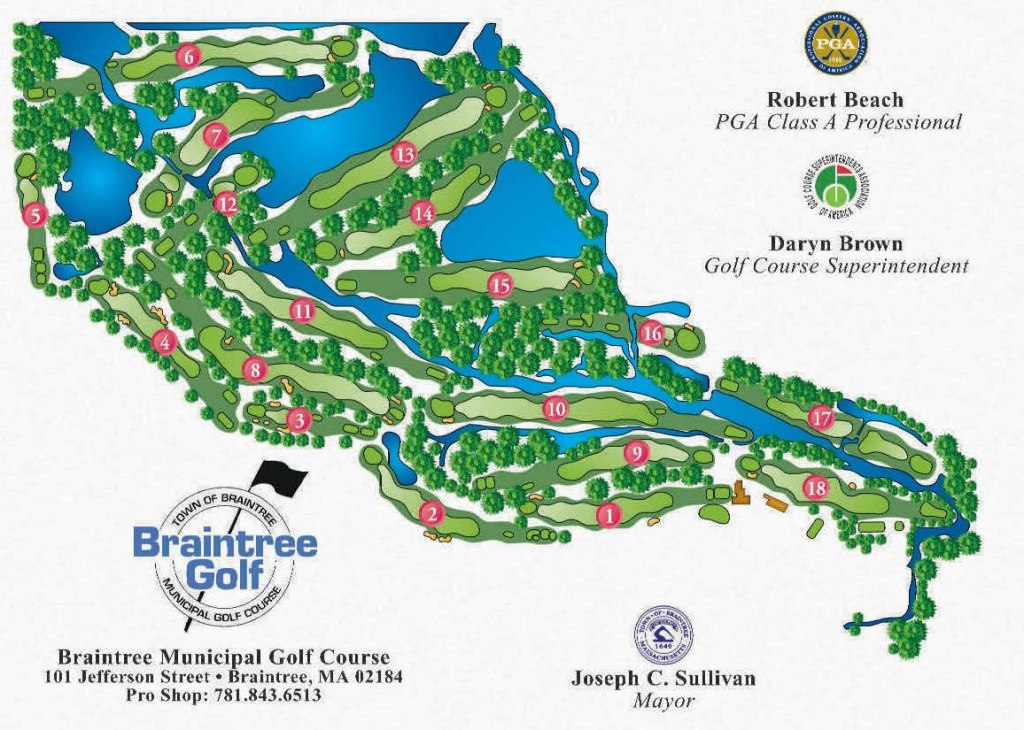
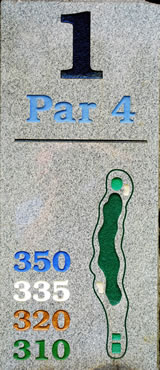
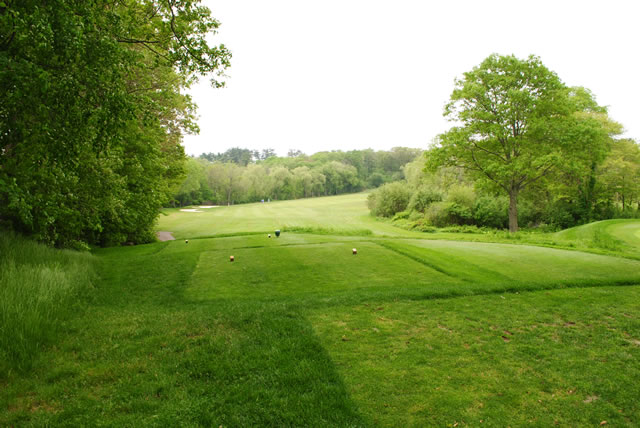
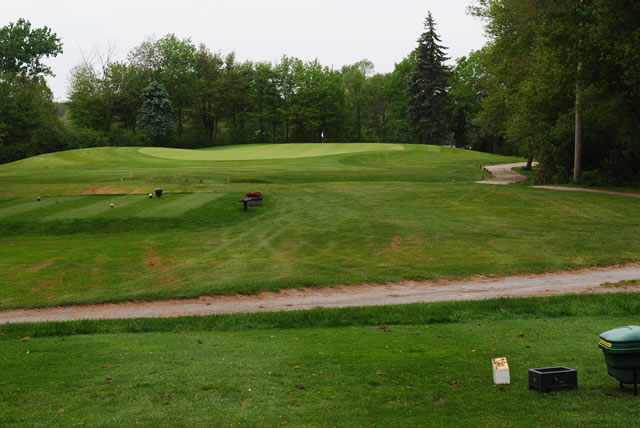
This is a great opening hole. The fairway runs left to right. A good drive to the left side of the 100 yard flag will leave a downhill approach shot to the green. A shot to the right might end up on the 9th fairway. The green is fairly flat but slopes a little back to front.Stay below the hole and you should be OK. A par here would be a good start.


This is a dog leg right with a pond protecting the green on the right side. A solid tee shot to the middle of the fairway will set you up for a 150 yard approach shot to the front of the green. Beware of the hook or slice here. The green slopes from back to front.


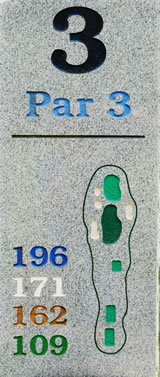
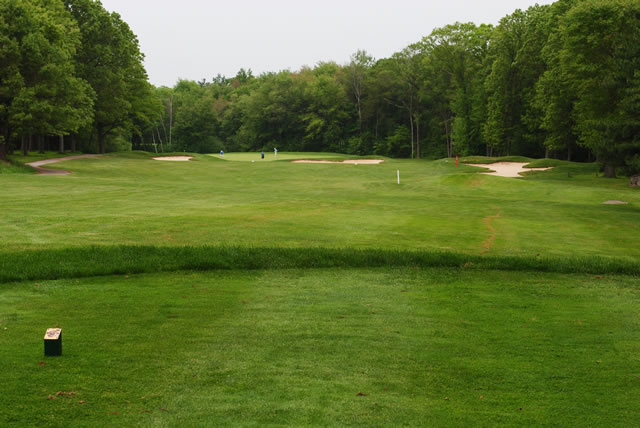
The first of the par 3’s is a 3 iron, 3 wood or hybrid shot to a fairly large sloping back to front green. Bunkers on both sides grab errant shots, and trees and cart path are all the way up the left side. A smart tee shot would be to the front of the green. The sloping green can cause three putts. Hit one less club off the tee.
A tee shot down the left side is the best play to set up a nice approach shot and avoid the bunkers running down the right side. A tee shot to the right will bring a bunker into play on your approach shot.


A tee shot down the left side is the best play to set up a nice approach shot and avoid the bunkers running down the right side. A tee shot to the right will bring a bunker into play on your approach shot.

Our first par 5. You may be tempted to swing away because of the large landing area but beware there is water on both sides. There is plenty of room left which is where you want to be for your approach shot. A bunker protects the front right side of the green.

This is a slight dog leg left but there is plenty of room on the right side. A good tee shot here will set you up for an over the creek approach shot. Or you can play it safe and lay up in front of the creek for a 60 yard approach to the sloping back to front green. When the flag is in front it is better to be short than long. At all cost you must stay below the hole. Plenty of room to the right off the tee.
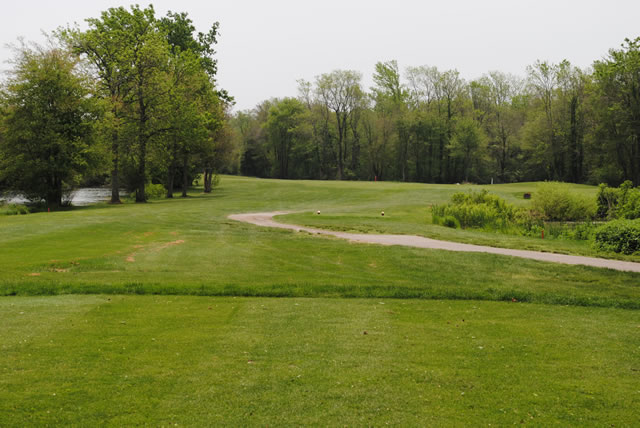

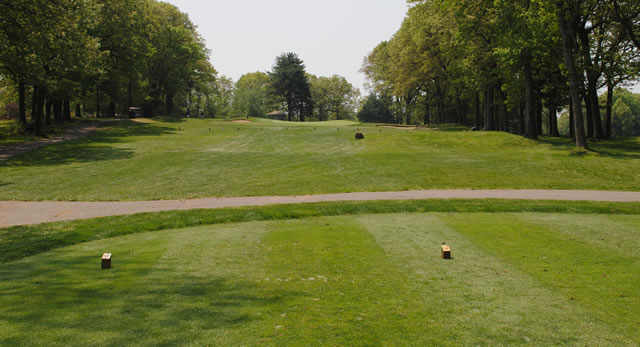
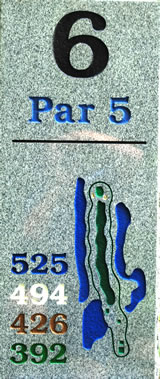
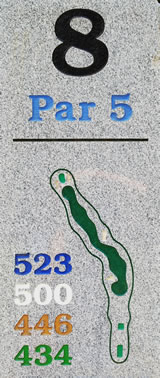
This is the second of our par 5 holes. A good tee shot to the right hand side will set you up for your second shot. Avoid hitting to the left side of the fairway on the tee shot because a fairway bunker may be your landing spot. Your second shot should be to the left side of the fairway to set up you approach shot to the slightly small green.

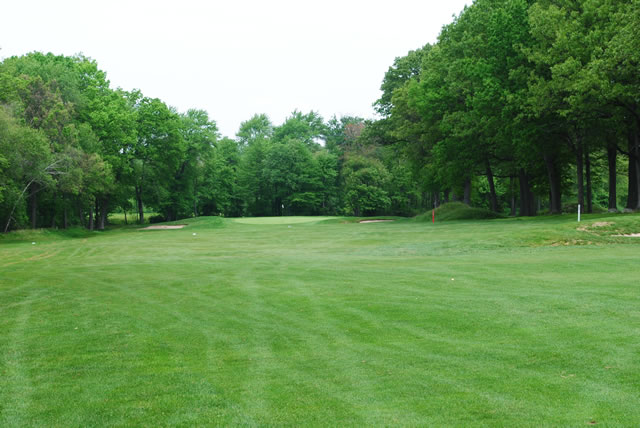
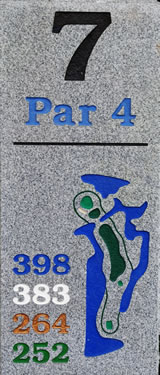
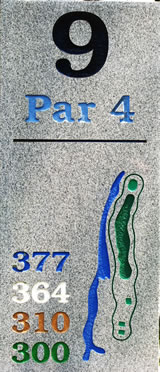
Keep your tee shot in the fairway. Your approach is pretty open and the green will break away from the clubhouse. Remember to stop at the “At the Turn Snack Shack” for a burger of hot dog or just to quench you thirst with water, gator aid, etc. You can call in your order from the 9th tee box. 508-967-8177


This is a great opening hole. The fairway runs left to right. A good drive to the left side of the 100 yard flag will leave a downhill approach shot to the green. A shot to the right might end up on the 9th fairway. The green is fairly flat but slopes a little back to front.Stay below the hole and you should be OK. A par here would be a good start.


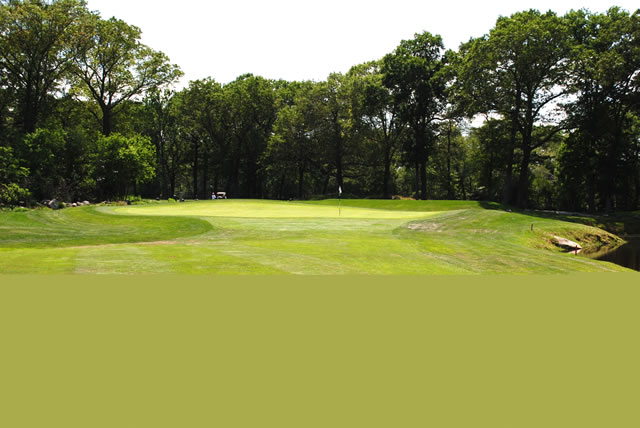
Play this hole left for the best approach to the green. The green is deeper than it looks and protected on the front right by a steep bunker. A five isn’t a bad score here.

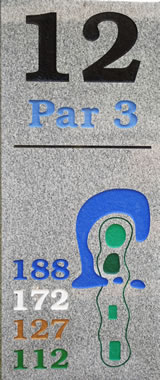
Number 12 is our third reachable par 3. 172 yards from the white and 127 yards from the golds. There is a creek in front of the green so you want to land your tee shot on the green. Plenty of room in the back to land your tee shot.

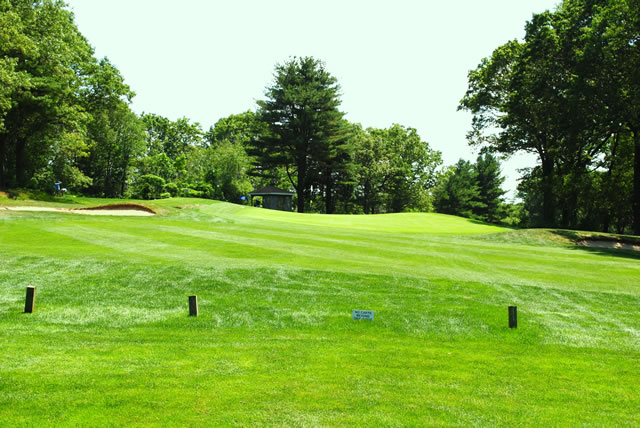
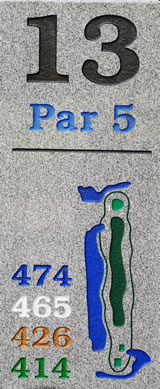
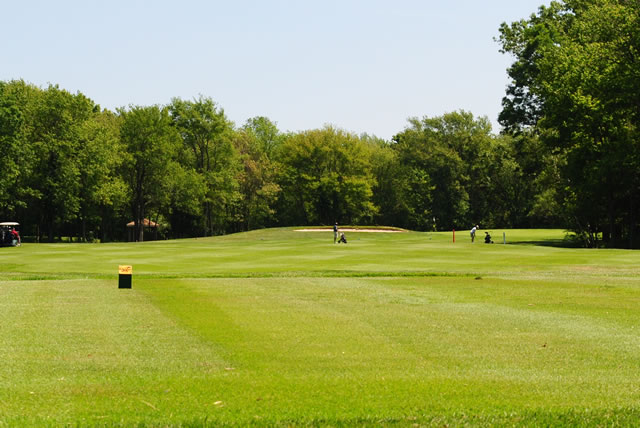
This is our third par 5. Go ahead and be aggressive here. This is easily a hole you can birdie. The left side of the fairway is best for a good approach. Just remember to stay away from the right side bunker. It’s pretty steep.
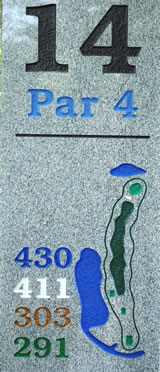
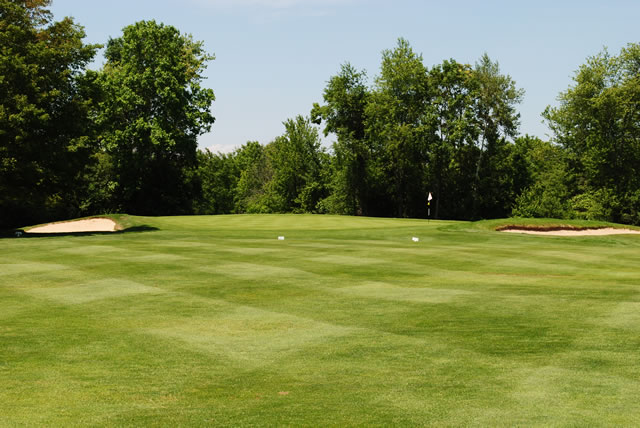
A slight dog leg right. Keep your shot left and aim for the pine tree off the tee. Stay away from the bunker on the left side of the green and you can walk away with a par.

This is the last tough hole on the back 9. Keep your tee shot in the fairway and bounce your second shot onto the green. Take your par and move on.


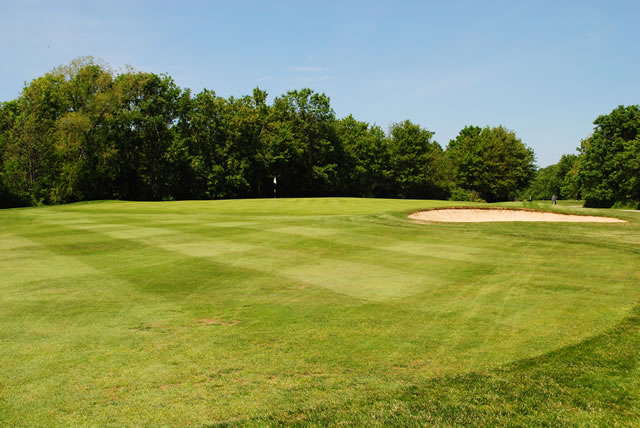
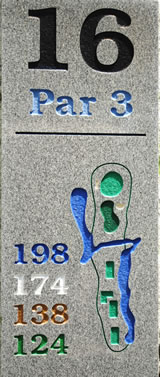
Some call this the signature hole. This is our last par 3. Hit one more club than you think off the tee because the green tends to hold. The bunkers shouldn’t bother you if you hit it straight.

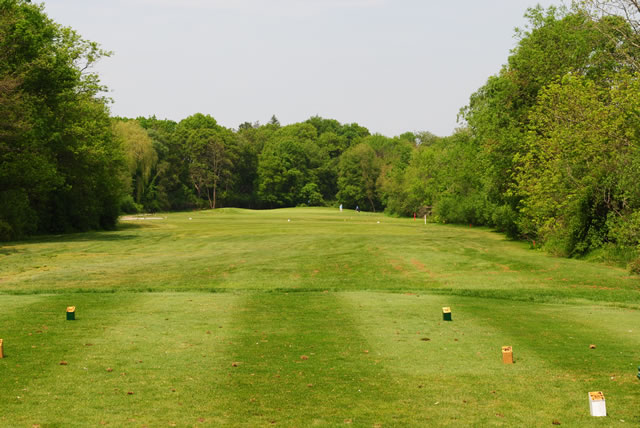
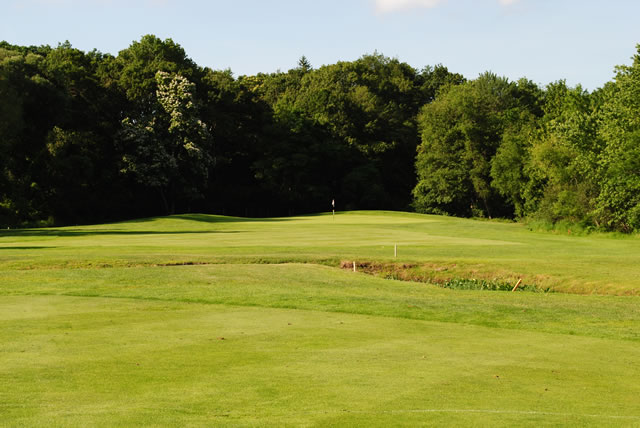
There is a creek running about 228 yards from the white tee box. Use the same club you used for your tee shot on hole 16. You’ll need to layup on this hole because of a creek running about 120 yards from the green.

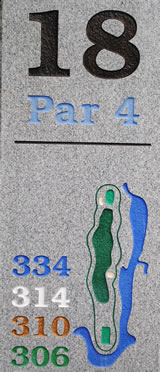
The final hole as you head for home. The fairway slopes from left to right. Aim at the clubhouse deck off the tee. On your approach shot to the small green there is a bunker on the left and trouble on the right. Once on the green the putts break away from the clubhouse.